


Home » Water Damage Remediation – Guidance for Homeowners
Water Damage Remediation - Guidance for Homeowners
Water entering your home can cause significant damage, especially if you do not take the necessary actions to mitigate water damage. Moreover, it can also be hazardous to you and your family’s health.
And to make matters worse, water damage is not always apparent at first sight – it might take days or weeks to manifest. In addition, trying to take care of water damage yourself instead of hiring a water damage remediation company is often futile.
In this section, we look at what water damage remediation entails and why failing to hire a reputable remediation company might exacerbate an already unpleasant experience.
What Is Water Damage Remediation?
Water damage remediation involves cleaning, neutralizing, and removing pollutants or other potential contaminants after a water damage event. Its purpose is to mitigate damages and ensure a safe environment devoid of health hazards.
For example, mold remediation is the best solution to tackle mold growth.
Remediation is typically complex and requires proper equipment and training to clean/remove affected materials and extract water, sediment, and excess moisture.
Remediation vs. Restoration
Many people assume the terms remediation and restoration are interchangeable. However, they are distinctly different.
Once the water, and the results of water contamination, are removed (remediation), the next step is to restore your home to its previous state (restoration). It might include replacing damaged floors and drywall or repairing damaged items.
Remediation and restoration are most effective when they are done together in a coordinated effort. And most water damage restoration companies offer a remediation service.
Elements of Water Damage Remediation
As previously mentioned, water damage remediation is often a complex process. Areas that require special attention include the following:
Removing All Wet Materials
When you suffer a covered water damage event, your insurance company does not expect you to be a remediation expert. However, they expect you to mitigate losses as a condition of your coverage. Failure to do so might compromise your water damage insurance claim.
For example, you risk not receiving the total compensation for your loss, or your insurer might not cover additional losses if you did not mitigate early damage.
Your insurer might even reject your claim by arguing that they cannot differentiate between the original damage and subsequent damage caused by your failure to take corrective actions.
Depending on the nature and extent of water damage to your home, you might want to call a water damage remediation company without delay. It does not mean you cannot or should not take immediate steps to mitigate further damage from occurring yourself.
For example, besides shutting off the water right away, such as in the event of a burst pipe, you should remove wet materials from the area if it is safe. In addition, remove materials that might suffer damage if they get wet.
For more information, refer to our section on what to do once you have identified water damage.
Drying Your Property After Water Damage Has Occurred

The sooner you can dry wet materials, the less likely they are to suffer permanent water damage.
As per the California Department of Insurance, if sudden water damage occurs to your property, dry all wet areas and provide proper air circulation to aid the drying process.
Steps you can take to dry wet materials include the following:
- Use a wet-dry vacuum (if it is safe to do so) to extract water from carpets.
- Open windows to ventilate, dehumidify and help dry the area.
- Dehumidify a contained area using a portable dehumidifier to remove water vapor from the air.
- Use towels to dry the floor or cabinets.
- Open doors, furniture drawers, and closet doors to create airflow.
- Use fans to circulate the air and assist in drying (only after you verify that there is no asbestos or lead in damaged building materials).
- If you have standing water several inches deep, a submersible sump pump can drain water out of your house through a hose.
- Keep all draperies off the floor.
- Mop up as much standing water as possible.
- Use sponges, rags, and towels to help soak up the water.
- Wipe furniture dry.
- Remove damp/wet books from shelves and compress them to avoid warping.
- Remove wet rugs, furniture, and fabrics from the area.
- Use a towel to remove water from the surface of drywalls and point fans to wet areas on the wall.
Likely, you will not have all the equipment needed to dry your property. If this is the case, and you cannot rent it, hire a water damage remediation company. And remember, time is of the essence.
Setup Containment for Cross-Contamination Prevention
Many homeowners (and even contractors) overlook setting up barriers to prevent water damage from spreading and causing cross-contamination.
Setting up a containment area helps to:
- Keep debris or hazardous materials in a confined space.
- Prevent airborne mold spores from spreading to other areas of your home.
- Avoid the need to clean up areas that were not originally affected by water damage.
In addition, the following steps can help prevent the spread of water damage:
1. Find the source of the water damage and stop it from causing further damage.
Removing or drying wet materials is futile if water keeps pouring into your home. If you cannot put a stop to the source of the water damage, it will continue to spread.
2. Extract or remove standing water.
Try to extract or remove standing water as soon as possible before it spreads to other areas of your home, causing further damage, including structural damage. However, leave the cleanup of contaminated black water up to the professionals as it presents a health hazard.
In addition, if you have a foot or more of water in your home, get professional help – it will take you too long to extract it on your own.
3. Remove loose items from the affected area.
Remove loose items prone to water damage from the affected area before they are damaged or sustain further water damage. It will also assist the drying process as such items might make it more cumbersome for you to dry floors and other surfaces.
4. Remove excess moisture from the air.
Open windows (if outside conditions are favorable) and use dehumidifiers or fans to remove excess moisture from the air and keep the air moving.
5. Sanitize the affected area.
Use disinfectant to clean and sanitize the area to mitigate the risk of mold and bacterial growth spreading throughout your home. However, if mold is visible, leave it up to the professionals to clean and remove as they have the right equipment to take care of it.
Talking about equipment, note that the equipment you use might also become contaminated – you might inadvertently contaminate other areas if you do not thoroughly clean it before further use.
Moisture Map the Structure
Moisture maps are images of surfaces that contain moisture with a superimposed grid showing moisture levels. It is a good way of identifying the location, size, and how moist various surface areas are.
It provides water migration data, and the user can record repeated readings for the same grid segments throughout the drying process to monitor and manage the drying process more efficiently.
A professional will test moisture and humidity levels at the beginning, during, and end of the drying process.
The best way to measure and document the drying process is by using Thermo hygrometers, moisture meters, and mapping technology.
By tracking the water from its initial source and following it in every direction it has migrated, a professional can establish an accurate diagnosis of the extent of the damage.
Understanding the types of affected materials, their porosity, water absorption, and moisture movement provides a solid framework for managing the drying process.
Note: One of the most popular tools on the market is the Tramex Meters app which has a moisture mapping feature when used with the ME5 moisture meter.
Asbestos and Lead Remediation
Asbestos and lead-based paint are present in millions of homes. If left undisturbed and if not deteriorating, lead-based paint and asbestos-containing products are not hazardous.
However, asbestos and lead-based paint might become hazardous if they are damaged. For example, after a fire high-pressure water hoses might cause water damage that could release harmful particles into the air.
Asbestos and lead both fall under the Toxic Substances Control Act (TSCA), as amended by the Frank R. Lautenberg Chemical Safety for the 21st Century Act.
Asbestos
The U.S. Consumer Product Safety Commission (UPSC) mentions several examples of where you might find asbestos hazards in a home, including:
- Some roofing and siding shingles contain asbestos cement.
- Houses built between 1930 and 1950 may have asbestos as insulation.
- Asbestos may be present in textured paint and patching compounds used on wall and ceiling joints. (Banned in 1977)
- Artificial ashes and embers sold for use in gas-fired fireplaces may contain asbestos.
- Older products, such as stove-top pads, may have some asbestos compounds.
- Walls and floors around wood-burning stoves may contain asbestos paper, millboard, or cement sheets.
- Asbestos is present in some vinyl floor tiles and the backing on vinyl sheet flooring and adhesives.
- Hot water and steam pipes in older houses may be coated with an asbestos material or covered with an asbestos blanket or tape.
- Oil and coal furnaces and door gaskets may have asbestos insulation.
The UPSC also has a list of do’s and don’ts for homeowners:
- Do keep activities to a minimum in any areas having damaged material that may contain asbestos.
- Do take every precaution to avoid damaging asbestos material.
- Do have removal and major repair done by people trained and qualified in handling asbestos. It is highly recommended that sampling and minor repairs also be done by asbestos professionals.
- Don’t dust, sweep, or vacuum debris that may contain asbestos.
- Don’t saw, sand, scrape, or drill holes in asbestos materials.
- Don’t use abrasive pads or brushes on power strippers to strip wax from asbestos flooring. Never use a power stripper on a dry floor.
- Don’t sand or try to level asbestos flooring or its backing. When asbestos flooring needs replacing, install new floor covering over it, if possible.
- Don’t track material that could contain asbestos through the house. If you cannot avoid walking through the area, have it cleaned with a wet mop. If the material is from a damaged area, or if a large area must be cleaned, call an asbestos professional.
When asbestos-containing products are damaged, microscopic fibers are released into the air. These fibers are easily inhaled and might cause lung cancer or mesothelioma – a malignant tumor that usually forms on the lining of the lungs.
There is a common misconception that asbestos is not present in buildings constructed after 1978. However, as pointed out in our article about common mistakes in homeowner insurance claims, it is incorrect. Any structure, regardless of its construction date, should be checked for hazardous materials before being restored or demolished.
Should it be necessary to repair or remove asbestos as a result of water damage, the CPSC offers the following tips and advice:
Repair: Usually involves either sealing or covering asbestos material.
Sealing (encapsulation) involves treating the material with a sealant that either binds the asbestos fibers together or coats the material so that fibers are not released. It should be done only by a professional trained to handle asbestos safely.
Covering (enclosure) involves placing something over or around the material that contains asbestos to prevent the release of fibers. Exposed insulated piping may be covered with a protective wrap or jacket.
- With any repair, the asbestos remains in place. Repair is usually cheaper than removal, but it may make later removal of asbestos, if necessary, more difficult and costly. Repairs can either be major or minor.
- Both major and minor repairs must be done only by a professional trained to handle asbestos. (There is always a risk of exposure to fibers when asbestos is disturbed)
- Doing minor repairs yourself is not recommended since improper handling of asbestos materials can create a hazard where none existed before.
- If you choose to do minor repairs, you should have as much information as possible on handling asbestos before doing anything.
- Contact your state or local health department or regional EPA office for information about asbestos training programs in your area. Your local school district may also have information about asbestos professionals and training programs for school buildings.
- Even if you have completed a training program, do not try anything more than minor repairs. Before undertaking minor repairs, carefully examine the area around the damage to ensure it is stable.
- As a general rule, any damaged area which is bigger than the size of your hand is not a minor repair.
- Before undertaking minor repairs, always wet the asbestos material using a fine water mist containing a few drops of detergent.
- Commercial products designed to fill holes and seal damaged areas are available. Small areas, such as pipe insulation, can be covered by wrapping a special fabric, such as wettable glass cloth, around it.

Removing asbestos poses the most risk of fiber release. However, it may be called for if asbestos material is damaged extensively and cannot be repaired.
Removal is complex and must be done only by a contractor with special training and licensing. Improper removal may increase the health risks to you and your family.
Asbestos and Lead Testing
It is nearly impossible to identify asbestos or lead-based paint in your home just by looking at it.
You typically have three options when it comes to asbestos and lead testing:
- Send samples to a lab for testing. (Not recommended)
- Buy a do-it-yourself test kit. (Not Recommended)
- Hire a professional to perform a test (best option).
Asbestos Testing
The best way to test for asbestos is to hire a licensed asbestos inspector.
A good inspector will take samples for testing and recommend corrective actions. Should the services of an asbestos contractor be required, the inspector can also ensure that the contractor has followed proper procedures. The inspector and contractor should be from two different firms to avoid a conflict of interest.
Note: If asbestos cannot be left undisturbed and has to be repaired (sealed or covered) or removed, do not try to do it yourself. Use a trained and accredited asbestos abatement contractor.
According to the UPSC, anyone who samples asbestos-containing materials should have as much information as possible on the handling of asbestos before sampling, and at a minimum, should observe the following procedures:
- Make sure no one else is in the room when sampling is done.
- Wear disposable gloves or wash hands after sampling.
- Shut down any heating or cooling systems to minimize the spread of any released fibers.
- Do not disturb the material any more than is needed to take a small sample.
- Place a plastic sheet on the floor below the area to be sampled.
- Wet the material using a fine mist of water containing a few drops of detergent before taking the sample. The water/detergent mist will reduce the release of asbestos fibers.
- Carefully cut a piece from the entire depth of the material using, for example, a small knife, corer, or other sharp objects. Place the small piece into a clean container (for example, a 35 mm film canister, small glass or plastic vial, or high-quality resealable plastic bag).
- Tightly seal the container after the sample is in it.
- Carefully dispose of the plastic sheet. Use a damp paper towel to clean up any material on the outside of the container or around the area sampled. Dispose of asbestos materials according to state and local procedures.
- Label the container with an identification number and clearly state when and where the sample was taken.
- Patch the sampled area with the smallest possible piece of duct tape to prevent fiber release.
- Send the sample to an asbestos analysis laboratory accredited by the National Voluntary Laboratory Accreditation Program (NVLAP) at the National Institute of Standards and Technology (NIST). A directory of NVLAP-accredited laboratories is available on the NVLAP website. Your state or local health department may also be able to help.
Lead Testing
The EPA recommends one of the following to tell if your home contains lead-based paint:
- Assume your home contains lead-based paint – If it was built before 1978, assume it contains lead-based paint and take the necessary precautions. This is the simplest and safest approach.
- Hire a certified professional to check for lead-based paint – A certified lead-based paint inspector or risk assessor can establish whether your home or a portion of your home, has lead-based paint. This will tell you in which areas lead-safe work practices should be used.
There are a number of lead test kits available on the market. The EPA has recognized some of them, but recognition “only applies to use by Lead-Safe Certified renovators.”
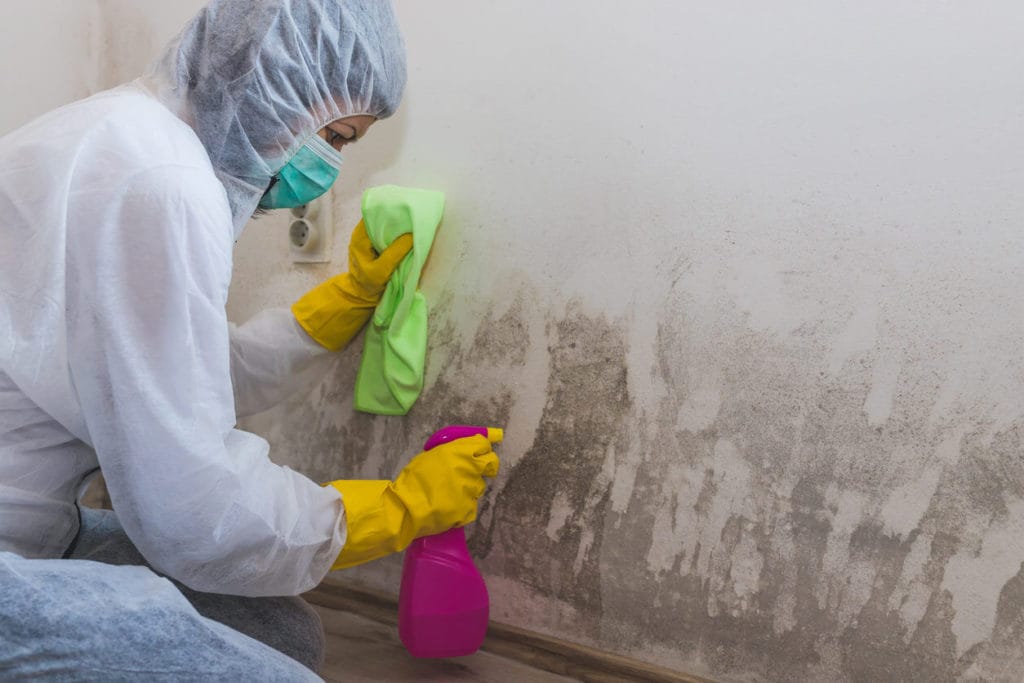
Mold Remediation

Mold often occurs after a water damage event, such as a burst pipe. However, it can also appear due to dampness and excess moisture in the air, leading to condensation. High humidity levels and poor ventilation can cause mold to spread fast.
Although a burst or dripping pipe, flood, or leaking roof is often an ideal catalyst for mold growth, it is not required. For example, mold and mildew frequently thrive in high-humidity environments such as bathrooms.
There are over 100,000 indoor and outdoor types of mold. Under the right conditions, mold can germinate and start growing within 24 – 48 hours. Early detection and corrective action are the only ways to prevent mold growth.
Mold needs moisture and a nutrient source to grow. Nutrient sources include wood, insulation, carpets, cardboard, ceiling tiles, wallpaper, drywall, fabric, paper, and upholstery.
Both water and mold damage can cause structural damage. However, whereas water damage, such as damage caused by a fire hose, can cause immediate damage, mold damage usually takes longer to manifest.
Mold will eventually eat away at the surface of what it grows on, causing rot and weakening, destroying that surface.
Mold growth is often hidden or not visible at first – it typically takes around three weeks before you can see it with the naked eye. By that time, mold spores might have spread to other areas of your home.
Even meticulously clean houses might have mold growing in unexpected places.
Signs of mold damage include:
a. Dirty-looking spots that feel soft, slimy, or damp that smear when touched
Mold often looks like dirt or a water stain before it starts spreading. One way to test if it is mold is to touch it (with gloves) – if it feels damp and smears easily, it is mold. Remember to wash your hands afterward as mold can be a health hazard.
b. A pungent or musty smell in your home or parts of it
The first sign of a mold infestation is often not the visual appearance of mold but a pungent or musty smell permeating the air.
c. Blueish, greenish, grayish, or black spots on your walls, ceiling, or other places
Mold comes in many colors that often look unusual and should attract your attention.
Common indoor molds include Cladosporium, Penicillium, and Aspergillus.
- Cladosporium – It is typically olive-green to brown or black.
- Penicillium – Starts off white and turns bluish-green, grayish-green, and even pink or yellow over time.
- Aspergillus – Typically looks blue-green to black on the surface and whitish or yellowish underneath.
d. Physical symptoms that might indicate the presence of mold
Health risks associated with indoor mold growth include:
- Sneezing
- Runny nose
- Red eyes
- Skin rashes
- Dizziness
- Headaches
- Asthma attacks
These risks are especially harmful to children, elderly people, and those with pre-existing respiratory illnesses. If you or your family start experiencing any of the above symptoms or if your symptoms worsen, mold might be the culprit.
e. The grout between your bathroom tiles is dark
If the grout between your bathroom tiles is dark or there is a buildup of gunk in the grout, it might be mold and mildew.
In addition, pay attention to any discoloration of your shower curtain.
f. Peeling wallpaper
Peeling and damp wallpaper often indicate the presence of moisture in the wall and mold.
As per the California Department of Insurance:
- When water leaks into your property, moisture can collect, allowing mold to develop. Mold can cause further damage to your property and can potentially cause health problems.
- If you notice water damage indicating leakage over time, mold may have already developed. In this case, attempting to clean up the mold may spread the spores, causing more property damage or health problems.
The key to preventing excess moisture or water damage from turning into mold is to fix any leaks and dry and clean the affected area without delay.
Here are some tips on how you can help prevent mold damage:
#1. Identify the Source and Do the Necessary Repairs
For mold to grow, water or excess moisture needs to be present. You cannot prevent mold damage if you have underlying water or moisture problems.
The sooner you fix the source of the problem, the more likely it is that you can mitigate further water damage and prevent mold from growing.
#2. Dry the Affected Area and Your Belongings
The following tips can help:
- Open the windows.
- Wipe up water on the floor.
- Remove any furniture that might get damaged.
- Place a dehumidifier in the room.
- Buy a cheap hygrometer and keep indoor humidity below 60%.
- – Use air conditioners and dehumidifiers
- – Increase ventilation
- – Use exhaust fans when necessary
#3. Hire a local mold inspector or mold inspection company.
Mold is often difficult to spot, and by the time you notice it, it might already be too late. Hiring a professional to examine your home for any signs of hidden mold is recommended, especially after suffering a water damage event.
Flood Cut
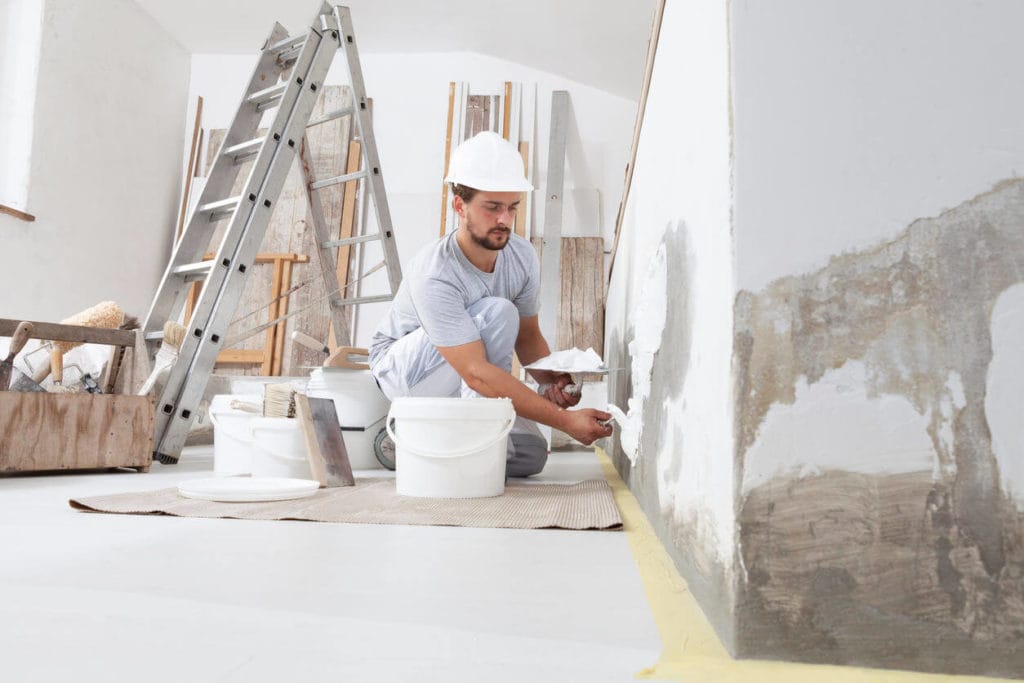
If you suffer water damage to your drywall, your remediation or restoration company may decide to perform a flood cut.
It involves cutting and removing part of your drywall – the cut is typically made about 12-24 inches above the highest water level reached. It helps to eliminate mold growth caused by moisture behind your drywall.
The main advantages of a flood cut are:
Easy access to areas behind your drywall – If your drywall is waterlogged after a water damage event, a flood cut allows for the easy removal of damaged materials.
Speeds up the drying process – After removing part of your drywall, it is easier to dry out hidden components behind your drywall.
Reduces the risk of further damage – The faster moisture is removed behind your drywall, the less likely secondary damage, such as mold growth, will occur.
Prevention – Anything from mud to sewage (black water) might contaminate water during a water damage event. A flood cut can prevent contaminated water from spreading up your drywall and causing harmful mold growth.
Flood cuts are almost always necessary in the case of contaminated black water or insulated drywall. Drywall holds moisture even if the drywall has sustained minimal water damage.
Note: There are three categories of water damage, namely clean water, gray water, and black water.
Category 1 – Clean water: Contact with clean water does not pose a health risk. An example of clean water includes water from a burst pipe.
Category 2 – Gray water: Water falling into this category is slightly contaminated and may cause health problems, such as nausea and diarrhea, if digested.
Category 3 – Blackwater: This type of water is hazardous, as it contains bacteria and other organisms that can lead to illness, disease, and infection. Possible sources of black water damage include groundwater flooding, sewage backups, and contaminated standing water.
Popular equipment used throughout the water damage remediation process

Popular tools of the trade in the water damage remediation and restoration industry include the following:
High-Volume Water Pumps
Suitable for extracting standing water in a home.
Industrial Air Movers
Industrial air movers (not to be mistaken for fans) circulate air faster throughout the affected area. They are ideal for drying floor coverings and wall cavities. They also prevent moisture from settling on absorbent surfaces. Using multiple industrial air movers simultaneously significantly reduces drying times.
Commercial-grade Dehumidifiers:
Rising humidity and excess moisture increase the risk of mold growth and can even accelerate it. Commercial-grade dehumidifiers, such as low-grain refrigerant (LGR) dehumidifiers, pull excess moisture from the air and expedite the drying process.
Moisture meters
Moisture meters measure moisture levels and can help identify the source of a water leak or burst pipe. By measuring moisture levels before and after water damage remediation, the company using them knows when the job is complete.
Air scrubbers
Left untreated, water damage can lead to the growth of mold. Air scrubbers suck pollutants such as mold spores through a filter to clean the air and prevent them from spreading to other areas in your home.
That’s a Wrap
Water damage remediation can be a complex and time-consuming process. However, failing to hire a water damage remediation company might compromise your and your family’s health and well-being.
And water damage remediation is only one component of a water damage insurance claim caused by a covered event.
If you have a large or complicated water damage claim, we recommend you contact a reputable public adjuster.
Avner Gat has over 17 years of experience as a public adjuster in Southern California – we cover Los Angeles, Ventura, Riverside, San Bernardino, Orange, and San Diego counties.
We have helped countless clients get the best settlement offer from their insurance companies, and we want to help you too.
Call us at (818) 917-5256 for a free, no-strings-attached consultation.
General Warning.
- You should not remove and/or disturb building materials without proper testing for Asbestos and Lead. If Asbestos and/or Lead are present in any building materials, you should employ a licensed abatement company to deal with them.
- Water Damages impose a great risk of electrical hazards. You should consult with a licensed electrician before you start to deal with a water damaged structure.
- We strongly recommend that only a licensed general contractor who specialize in remediation will be employed to deal with water damaged structures.